
Easy Honey Garlic Chicken Breast Recipe for Family Meals
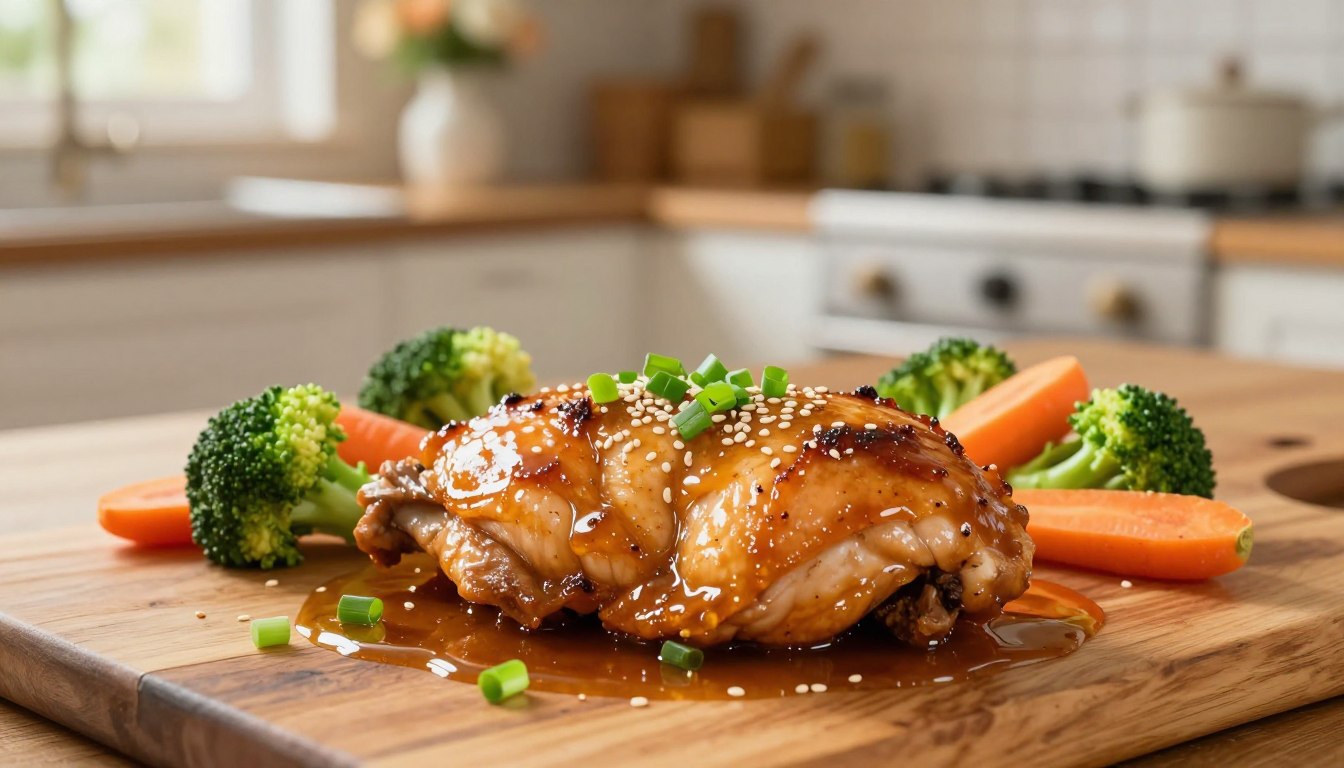
Finding time to cook a wholesome dinner after a long day often feels like a challenge. You want a meal that is quick to prepare but still packed with flavor. This Honey Garlic Chicken Breast dish is the perfect solution for your busy schedule.
This simple recipe transforms basic pantry staples into a meal your entire family will love. It strikes a perfect balance between sweet and savory notes, making it a delicious choice for picky eaters and adults alike.
Whether you are a novice in the kitchen or a seasoned home chef, you will find this process incredibly easy to follow. By mastering this reliable recipe, you can simplify your dinner rotation and enjoy more quality time at the table.
Key Takeaways
- Learn how to prepare a balanced, family-friendly meal in under thirty minutes.
- Discover the secret to achieving a perfectly caramelized glaze every time.
- Understand why this dish is a top choice for busy weeknight schedules.
- Get tips on how to pair this protein with healthy sides for a complete dinner.
- Master a versatile cooking method that works for various skill levels.
Why Honey Garlic Chicken Breast is the Ultimate Family Dinner
When you need a dependable dinner, this recipe offers the perfect balance of flavor and ease. Chicken breast serves as an incredibly versatile protein that adapts beautifully to a wide range of glazes. Whether you prefer a sweet finish or a savory kick, this base ingredient provides the ideal canvas for your culinary creativity.

Families often struggle to find a healthy meal that everyone at the table will actually enjoy. This dish remains a top choice for parents because it delivers consistent, delicious results every single time. By relying on a proven method, you can significantly reduce the stress that often accompanies the hectic evening hours.
Beyond the taste, the minimal cleanup required makes this a standout option for your weekly dinner rotation. You spend less time scrubbing pans and more time connecting with your loved ones after a long day. This efficiency is exactly why so many households consider it a staple for a stress-free dinner.
Focusing on flavor harmony ensures that your meal is both nutritious and satisfying. By choosing high-quality ingredients, you provide your family with a wholesome experience that feels like a treat. It is truly the ultimate solution for busy nights when you want to serve something special without the extra work.
Essential Ingredients for Your Homemade Marinade
Building a professional-grade meal at home is easier than you might think when you start with the right ingredients. A homemade sauce relies on the freshness and quality of every component you add to the bowl. By focusing on these core elements, you ensure that your final dish has a depth of flavor that stands out.

Selecting the Best Quality Chicken Breasts
The foundation of your meal is the protein itself. Choosing high-quality chicken breasts is vital because the meat acts as a sponge for your marinade. Look for fresh, plump cuts that are free from excess water or bruising to ensure the best texture.
When you start with premium chicken, you guarantee a juicy result every time. Quality matters because it dictates how well the meat holds onto the glaze during the cooking process. Avoid frozen options if possible, as they often release too much moisture and dilute your flavors.
The Role of Fresh Garlic and Honey
These two ingredients are the stars of your recipe. Fresh garlic provides a sharp, pungent base that cuts through the sweetness, while high-quality honey acts as the primary thickening agent. When heated, the natural sugars in the honey caramelize to create that signature sticky texture you crave.
- Fresh Garlic: Always mince it finely to release the essential oils.
- Pure Honey: Use raw or clover honey for the best consistency.
- Chemical Reaction: The sugars in honey help the glaze cling to the chicken surface.
Balancing Flavors with Soy Sauce and Aromatics
Achieving a professional taste requires a careful balance between salt and sweetness. Soy sauce provides the necessary savory depth, but it must be tempered by other aromatics to prevent the dish from becoming too salty. You can experiment with these additions to customize your homemade profile:
Consider adding a splash of rice vinegar or a hint of toasted sesame oil to round out the profile. These small adjustments transform a simple marinade into a complex, restaurant-quality sauce. Balance is the secret to ensuring that no single flavor overpowers your palate.
Preparing Your Chicken for Maximum Flavor Absorption
Achieving deep flavor penetration starts long before the chicken hits the hot skillet. When you take the time to handle your ingredients with care, you ensure that every bite is packed with the savory notes of your homemade marinade. Proper preparation is the foundation of an easy and successful dinner.
Proper Cleaning and Trimming Techniques
Start by patting your chicken breasts dry with a paper towel to remove excess surface moisture. Use a sharp knife to carefully trim away any visible fat or gristle, as these parts can interfere with the texture of your finished dish. A clean surface allows the seasoning to adhere much better to the meat fibers.
“Quality preparation is the difference between a standard meal and a memorable dining experience.”
The Importance of Even Slicing for Uniform Cooking
Consistency is vital when you want a quick and reliable result. If your chicken pieces vary significantly in thickness, some parts will overcook while others remain raw. Aim to slice your breasts into uniform strips or medallions to ensure they cook at the same rate.
- Use a sharp chef’s knife for clean cuts.
- Keep slices between 1/2 to 3/4 inch thick.
- Avoid shredding the meat by using a smooth, sliding motion.
Marinating Strategies for Busy Weeknights
You do not need hours to infuse your poultry with bold flavors. For an easy weeknight solution, place your chicken and marinade into a sealable plastic bag and massage the liquid into the meat. This quick method forces the flavors into the fibers much faster than simply letting it sit in a bowl.
If you are truly pressed for time, consider slicing the chicken before adding the marinade. Smaller surface areas absorb the liquid in as little as fifteen minutes, making it a perfect strategy for your busiest evenings. Proper planning ensures you never have to sacrifice taste for convenience.
Mastering the Skillet Method for Golden Results
The secret to a perfect honey garlic crust lies in how you manage your skillet during the cooking process. Achieving that professional, golden-brown finish requires more than just high heat; it demands precision and the right equipment. By focusing on your technique, you can lock in natural juices while creating a delicious, caramelized exterior.
Choosing the Right Pan for Even Heat Distribution
Your choice of cookware significantly impacts how your food cooks. A heavy-bottomed stainless steel or cast-iron skillet is ideal because these materials retain heat consistently. Thin pans often create hot spots, which lead to uneven browning and potential burning of your delicate glaze.
Investing in a high-quality pan ensures that the temperature remains stable throughout the cooking time. This stability is vital when you want to achieve a uniform sear across every piece of chicken in the pan.
Achieving the Perfect Sear on Chicken Breasts
To get that beautiful crust, ensure your chicken is dry before it hits the hot surface. Patting the meat with paper towels removes excess moisture, allowing the protein to brown rather than steam. Place the chicken into a preheated skillet with a small amount of oil, and resist the urge to move it too soon.
Allow the chicken to develop a deep, golden color undisturbed for several minutes. This patience results in a flavorful crust that acts as a barrier, keeping the inside of the breast tender and moist.
Managing Heat to Prevent Burning the Honey Glaze
Honey contains natural sugars that caramelize quickly and can turn bitter if the heat is too high. Once you add your glaze to the skillet, lower the temperature to a gentle simmer. This adjustment allows the sauce to thicken and coat the chicken evenly without scorching the sugars.
Keep a close eye on the pan during these final minutes of cooking. If the sauce begins to bubble too aggressively, move the pan off the heat source briefly to maintain control.
| Pan Material | Heat Retention | Best Use |
|---|---|---|
| Cast Iron | Excellent | High-heat searing |
| Stainless Steel | Good | Even browning |
| Non-Stick | Low | Delicate glazes |
The Baked Alternative for Hands-Off Cooking
Sometimes, the best way to prepare a family meal is to let your oven do the heavy lifting. Choosing a baked method allows you to step away from the stove, giving you more time to focus on other tasks while your dinner cooks to perfection.
Adjusting Oven Temperatures for Juicy Meat
To keep your chicken tender, you must manage your oven temperature carefully. A moderate heat setting, typically around 375°F, is ideal for ensuring the meat cooks through without drying out.
“The secret to succulent poultry lies in consistent heat and patience, allowing the natural juices to redistribute within the fibers.”
Avoid the temptation to crank up the heat for a faster cook time. High temperatures often lead to tough, rubbery textures that ruin the dining experience.
Using Foil Packets to Lock in Moisture
One of the most effective ways to guarantee a moist result is by using foil packets. This technique creates a steam-infused environment that forces the marinade deep into the chicken breast.
- Place each chicken breast on a large piece of heavy-duty aluminum foil.
- Pour your honey garlic sauce generously over the meat.
- Seal the edges tightly to prevent any steam from escaping during the baked process.
Converting Skillet Recipes to Oven-Ready Versions
You can easily adapt your favorite stovetop recipes for the oven with just a few minor tweaks. Simply prepare your marinade as usual, but reduce the liquid slightly to account for the lack of evaporation that occurs in a skillet.
Once your chicken is prepped, transfer it to a baking dish or individual foil packets. This baked approach is perfect for busy weeknights when you need a reliable, hands-off solution that delivers consistent, delicious results for your entire family.
Creating the Perfect Sticky Honey Garlic Glaze
Transforming simple ingredients into a thick, flavorful glaze is a skill every home cook can master. The goal is to achieve a glossy coating that clings to the chicken without becoming too syrupy or burnt. By paying close attention to your pan, you can ensure your final dish is truly delicious.
Reducing the Sauce to the Ideal Consistency
To get that signature sticky texture, you must allow the sauce to simmer gently after adding the honey and soy mixture. Keep the heat at a medium-low setting to prevent the sugars from caramelizing too quickly. You will know it is ready when the bubbles become larger and the liquid coats the back of a spoon.
Watch the pan closely during these final minutes of cooking. If the sauce reduces too much, it may become hard or candy-like once it cools. Aim for a consistency that is thick enough to glaze the meat but still fluid enough to pour over your sides.
Troubleshooting Common Glaze Issues
Sometimes, the sauce might not thicken as expected or could appear to separate. If your glaze remains too thin, try increasing the heat slightly for a minute while stirring constantly. You can also whisk in a tiny amount of cornstarch slurry to help it bind if you are in a hurry.
- Sauce too thin: Simmer for an additional two minutes or add a teaspoon of cornstarch.
- Broken sauce: Remove from heat and whisk in a tablespoon of cold butter to emulsify.
- Burnt flavor: If the garlic darkens too fast, lower the heat and add a splash of water or broth.
Adding Extra Depth with Ginger and Chili Flakes
You can easily customize your sauce to create a more flavorful profile by introducing aromatics. Freshly grated ginger provides a bright, zesty kick that cuts through the sweetness of the honey. Meanwhile, a pinch of red chili flakes adds a subtle heat that makes the meal feel more complex and delicious.
Experiment with these additions by stirring them into the pan during the last minute of the reduction process. This keeps the ginger fresh and prevents the chili flakes from burning. These small adjustments turn a standard recipe into a gourmet experience for your family.
Healthy Variations for Your Family Meal Plan
Making your dinner routine more nutritious does not mean you have to sacrifice the bold flavors you love. You can easily adapt your favorite Honey Garlic Chicken Breast recipe to fit specific dietary needs while keeping the meal satisfying for everyone at the table.
Low-Sodium Alternatives for Soy Sauce
If you are watching your salt intake, you do not need to give up the savory depth of your sauce. Many standard soy sauces contain high levels of sodium, but you can find excellent alternatives that maintain that classic umami profile.
- Coconut aminos: A popular soy-free and lower-sodium choice that adds a touch of natural sweetness.
- Reduced-sodium soy sauce: A simple swap that cuts salt content without changing the texture of your glaze.
- Diluted broth: Mixing a small amount of soy sauce with low-sodium chicken stock can stretch the flavor while reducing the overall salt concentration.
Incorporating Fresh Vegetables into the Skillet
Transforming your dish into a complete, one-pan meal is a healthy way to increase your daily fiber intake. By adding colorful produce directly into the skillet, you save time on cleanup and ensure a balanced dinner.
Try tossing in crisp broccoli florets, sliced bell peppers, or snap peas during the final minutes of cooking. These vegetables absorb the sticky glaze beautifully, adding a fresh crunch that complements the tender meat.
Gluten-Free Substitutions for Honey Garlic Chicken
Creating a gluten-free version of this meal is straightforward and requires only minor pantry adjustments. The most important change involves replacing standard soy sauce with tamari, which is naturally brewed without wheat.
Additionally, if your recipe calls for a thickener, use cornstarch or arrowroot powder instead of wheat-based flour. These simple modifications ensure that your Honey Garlic Chicken Breast remains safe and delicious for every member of your family to enjoy.
Pairing Suggestions to Complete Your Meal
Turning your chicken into a balanced, healthy meal is all about selecting the right accompaniments. When you serve a flavorful, sticky dish, the sides you choose should enhance the overall experience of your dinner. By focusing on texture and flavor contrast, you can create a restaurant-quality plate right in your own kitchen.
Best Grains and Starches to Soak Up the Sauce
The secret to a satisfying meal often lies in the base you choose. Fluffy jasmine rice is a classic choice because its light, floral aroma complements the sweetness of the honey glaze perfectly. If you prefer a nutritious alternative, quinoa offers a wonderful nutty texture that holds onto the sauce without becoming mushy.
For those who enjoy a bit of comfort, creamy mashed potatoes or even roasted sweet potatoes can provide a hearty foundation. These starches act like a sponge, ensuring that not a single drop of your delicious homemade sauce goes to waste.
Steamed and Roasted Vegetable Sides
Adding vegetables is the easiest way to ensure your dinner remains a healthy choice for the whole family. Steamed broccoli or snap peas provide a vibrant crunch that contrasts beautifully with the tender chicken. If you prefer a deeper flavor profile, roasting carrots or asparagus with a touch of olive oil brings out a natural sweetness that pairs well with garlic.
“The secret of a great meal is the harmony between the main dish and its sides; balance is the key to culinary success.”
— Anonymous Chef
Fresh Salad Pairings to Balance the Sweetness
Because the honey garlic glaze is naturally sweet, you need an acidic element to cleanse the palate. A crisp cucumber salad tossed in rice vinegar or a bright slaw with lime juice works wonders. These fresh components cut through the richness of the glaze, making every bite feel light and refreshing.
| Side Dish Category | Recommended Option | Flavor Benefit |
|---|---|---|
| Grains | Jasmine Rice | Absorbs sauce well |
| Vegetables | Roasted Broccoli | Adds earthy texture |
| Salad | Cucumber Slaw | Provides acidic contrast |
| Starch | Quinoa | High fiber content |
Storing and Reheating Leftovers Safely
Mastering the art of storage allows you to enjoy your favorite chicken dish long after the initial meal. When you prepare a batch of Honey Garlic Chicken Breast, proper handling ensures that every bite remains as flavorful and safe as the first.
Proper Refrigeration Techniques for Cooked Chicken
To maintain the highest quality, you must cool your cooked chicken quickly before placing it in the refrigerator. Avoid leaving the meat at room temperature for more than two hours, as this encourages bacterial growth.
Always store your leftovers in airtight containers to lock in moisture and prevent the absorption of other refrigerator odors. When sealed correctly, your Honey Garlic Chicken Breast will stay fresh and delicious for up to three to four days.
Best Methods for Reheating Without Drying Out
Reheating chicken can often lead to a rubbery texture if you are not careful. To avoid this, add a small splash of water or chicken broth to the pan before warming it over medium-low heat.
This simple technique creates a gentle steam that keeps the meat tender. If you prefer using a microwave, cover the dish with a damp paper towel to retain essential moisture during the process.
Freezing Your Honey Garlic Chicken for Future Meals
If you want to save your meal for a later date, freezing is an excellent option. Place the cooled chicken into heavy-duty freezer bags, removing as much air as possible to prevent freezer burn.
Properly frozen Honey Garlic Chicken Breast can maintain its quality for up to two months. When you are ready to eat, simply thaw the container in the refrigerator overnight and reheat it thoroughly until it reaches a safe internal temperature.
Common Mistakes to Avoid When Cooking Chicken Breast
Mastering the art of cooking chicken breast is easier when you know exactly which mistakes to avoid. Even a quick meal can become disappointing if you overlook the basic principles of heat management and preparation. By identifying these common pitfalls, you can ensure your dinner remains consistently high-quality and delicious.
Preventing Overcooked and Rubbery Meat
The most frequent error home cooks make is leaving the chicken in the pan for too long. Chicken breast is lean, meaning it loses moisture rapidly once it passes the ideal internal temperature. You should aim for an internal temperature of 165°F to ensure the meat is safe to eat without becoming dry.
Using a reliable meat thermometer is the best way to track your progress. Never rely solely on visual cues, as the exterior can look golden while the center remains undercooked or becomes overdone. Removing the chicken from the heat just as it hits the target temperature allows for a brief resting period, which keeps the juices locked inside.
Avoiding Burnt Garlic and Bitter Flavors
Garlic is a vital component for a flavorful dish, but it burns much faster than the chicken itself. If you add minced garlic to a hot skillet too early, it will turn dark brown and release a harsh, bitter taste. This bitterness can quickly ruin the balance of your entire sauce.
To prevent this, add your garlic during the final minute of cooking. This short window of time is enough to release the aromatic oils without scorching the cloves. If you notice the garlic browning too fast, lower the heat immediately or remove the pan from the burner for a few seconds.
Ensuring Food Safety During Preparation
Maintaining a clean workspace is just as important as the cooking process itself. Always keep raw chicken separate from other ingredients to prevent cross-contamination. Use a dedicated cutting board for your poultry and wash your hands thoroughly after handling the raw meat.
Proper preparation ensures that your final meal is both safe and flavorful for your family. By following these simple guidelines, you will gain the confidence to prepare a perfectly cooked chicken breast every time you step into the kitchen.
Customizing the Recipe to Suit Your Family Preferences
You can easily transform this basic meal into a signature dish that reflects your family’s unique palate. By making small adjustments, you turn a standard recipe into a personalized experience that everyone at your table will love.
Adjusting Sweetness and Spice Levels
Finding the right balance of flavors is the secret to a perfect homemade meal. If your family prefers a less sugary profile, simply reduce the honey and increase the soy sauce slightly to add more savory depth.
For those who crave a bit of heat, you can incorporate red pepper flakes or a dash of sriracha into the glaze. Start with a small amount and taste as you go to ensure the spice level remains comfortable for all your guests.
Adding Texture with Toasted Sesame Seeds and Scallions
Adding the right garnish provides a professional touch and a satisfying crunch to your finished dish. Toasted sesame seeds offer a nutty aroma that complements the sweetness of the honey perfectly.
Freshly sliced scallions add a bright, crisp contrast to the sticky glaze. These simple additions elevate the visual appeal of your recipe while providing a fresh bite that balances the richness of the chicken.
Scaling the Recipe for Large Family Gatherings
Whether you are cooking for a quiet weeknight or a large celebration, this homemade dish is incredibly versatile. When scaling up for a crowd, ensure you use a large enough skillet to avoid overcrowding the meat.
- Double the ingredients for larger groups to maintain the correct sauce-to-chicken ratio.
- Use multiple pans if necessary to ensure every piece of chicken gets a proper sear.
- Prepare the glaze in a separate pot to ensure you have enough to coat every serving evenly.
Conclusion
Cooking a perfect honey garlic chicken breast transforms your weekly meal plan into a reliable culinary success. You now possess the knowledge to select quality ingredients and apply precise heat control for consistent results.
Your ability to balance sweet and savory notes creates a restaurant-quality experience at home. This simple dish serves as a foundation for your future kitchen experiments. You can adjust spice levels or swap proteins to keep your family excited about dinner time.
Consistent practice builds your confidence with every sear and glaze reduction. You hold the tools to turn basic pantry staples into a memorable feast. Enjoy the process of creating healthy meals that bring everyone to the table.
Share your favorite variations with friends or try new side dishes to keep the menu fresh. Your journey toward becoming a more skilled home cook starts with these small, flavorful steps. Keep exploring new flavor profiles to make this recipe uniquely yours.
FAQ
How long should I marinate the honey garlic chicken breast for the best flavor?
For a truly flavorful result, you should aim to marinate your honey garlic chicken breast for at least 30 minutes. However, if you are planning a quick weeknight dinner, even a 15-minute soak in your homemade marinade will significantly enhance the taste. For maximum flavor absorption, you can prep the chicken in a Ziploc bag the night before, which makes your family meal preparation even faster the next day.
Can I make this recipe healthy if I am watching my sodium intake?
Yes, you can easily adapt this recipe to be more healthy by using Kikkoman Low-Sodium Soy Sauce or Coconut Secret Coconut Aminos as a gluten-free alternative. To add more nutrients to your homemade meal, try incorporating fresh vegetables like broccoli or bell peppers directly into the skillet to create a well-balanced, one-pan delicious dinner.
What is the secret to getting a sticky glaze without burning the garlic?
The key to a perfect honey glaze is heat management. When using the skillet method, you should sear the chicken first and then add your garlic during the last minute of cooking. This prevents the garlic from turning bitter. Once you add the liquid marinade, reduce the heat to medium-low, allowing the sugars to caramelize into a thick, sticky coating without scorching.
Is it better to prepare this dish as a baked meal or in a skillet?
Both methods yield delicious results, but your choice depends on your schedule. The skillet method is ideal for a quick sear and a golden-brown crust. If you prefer a hands-off approach, the baked version using Reynolds Wrap foil packets is excellent for locking in moisture, ensuring your chicken breast remains juicy while you focus on other tasks.
How can I prevent my chicken breast from becoming rubbery or dry?
To ensure your meat stays tender, use a Thermapen meat thermometer to check that the internal temperature reaches exactly 165°F. Another professional tip is to practice even slicing; by cutting your poultry into uniform pieces, you ensure that every morsel cooks at the same rate, preventing smaller pieces from overcooking while larger ones finish.
How should I store and reheat leftovers to maintain the best quality?
Store your leftovers in an airtight Pyrex container in the refrigerator for up to four days. When you are ready to eat, reheat the chicken in a pan over low heat with a splash of water or chicken broth. This creates steam that thins the honey garlic sauce and prevents the meat from drying out, making your second-day dinner just as delicious as the first.
Can I customize the spice level of this honey garlic chicken breast recipe?
Absolutely. You can easily adjust the profile of your homemade dish by adding McCormick Red Pepper Flakes or freshly grated ginger to the marinade. If your family prefers a milder taste, increase the honey ratio for a sweeter finish. Garnish with Badia Sesame Seeds and fresh scallions to add extra texture and a professional look to your family meal.